
Here we take you through the steps needed to take your “Blues in a can” kit through to the point of being an awesome playable instrument.
For this assembly you will need:
- A medium size Philips head screwdriver (for tightening the friction tuners)
- Possibly an additional slot-head screwdriver (depending on the type of screw included with your kit for securing the neck to the can)
- Wirecutters (for snipping the excess string ends once tuned)
Carefully unpack the contents of the large postal tube your kit arrived in. Your kit consists of the following:
- A neck
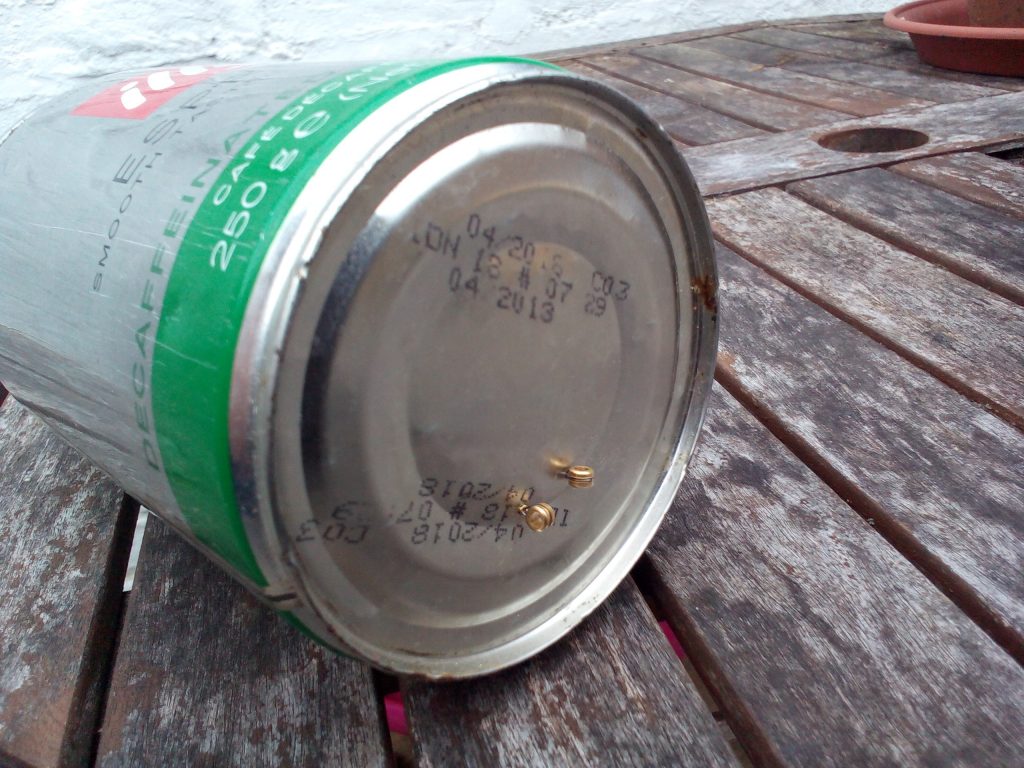
- A top quality coffee can
- A “bag of bits”
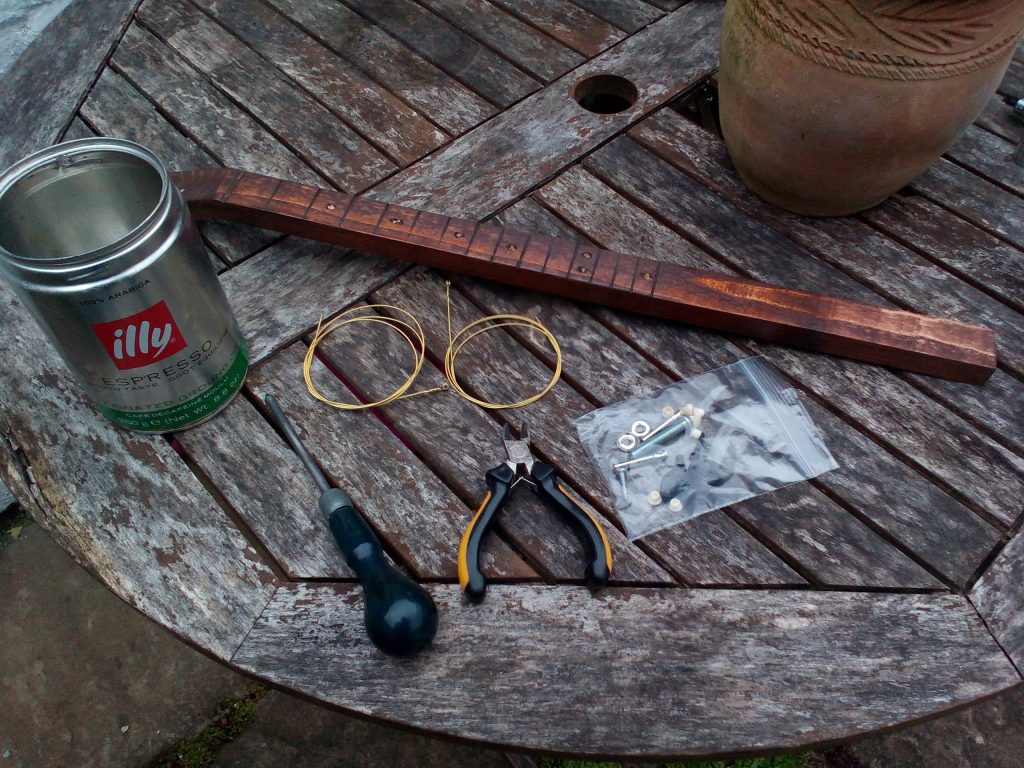
The all-important “bag of bits” contains:
- 7 x fret marker dots (repurposed kitchen unit blanking caps)
- 2 x tuning peg capstans (the shaft where the string passes through)
- 2 x chrome surface washers (to prevent the capstans from sinking beneath the surface of the wood)
- 2 x tuning peg fobs (for turning the capstan to tighten and loosen the string)
- 2 x black steel screws (for securing the fob to the capstan and tightening for a stable tuning)
- 2 x steel acoustic guitar “wound” strings (1 for a D and 1 for a G)
- 1 x 5mm diameter dome-head steel bolt (for use as the instrument “nut” ironically)
- 1 x small reclaimed screw (may be cross or slot-head depending on available salvage)
- 1 x courtesy hand-cut metal starter slide (see our slides page for details how to upgrade to a genuine bottleneck slide)
- 1 x business card (keep as a memento or pass on to a friend intrigued by your soon to be born unique instrument)
- 1 x plectrum/key-ring/necklace pendant/bracelet charm (someone will have a use for it surely if not you)
- NEW 1 x sticker of our logo (to give your finished instrument that Salvage Sounds style)
Caution: Take care if placing your hand or fingers inside the can. The can has all the holes needed pre-drilled but the ends inside the can will be sharp – especially the hole at the back of the can near the rim (although we do always try to file the worst of it off before sending out)
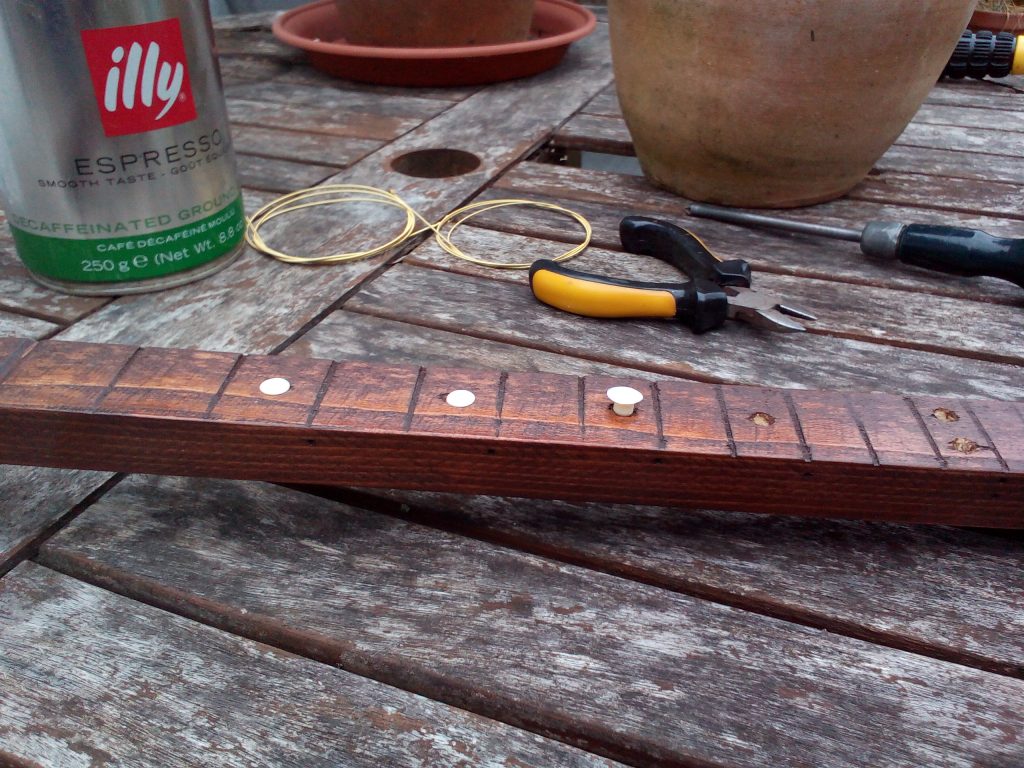
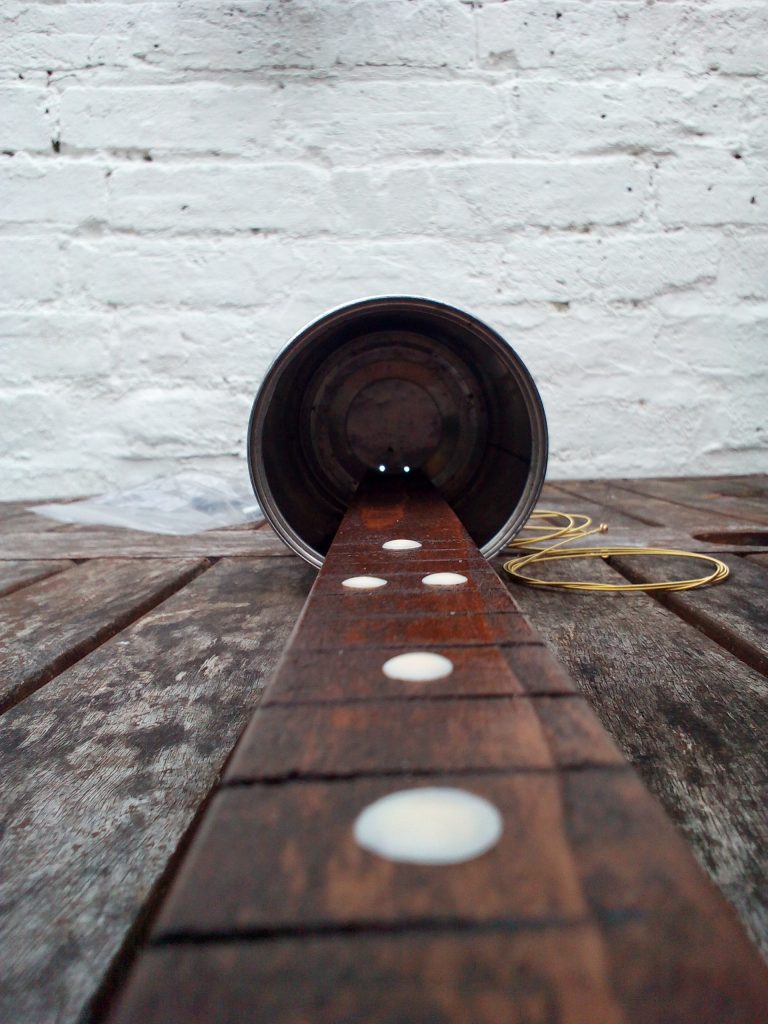
Begin by pressing the fret markers into the pre-prepared cavities on the neck in the typical positions (of this 15 “fret” instrument). The “dots” should remain securely in place without fixing and not fall out, but if needed simply drop a very small blob of PVA glue into the bottom of the cavity before pressing in the cap and that will do it.
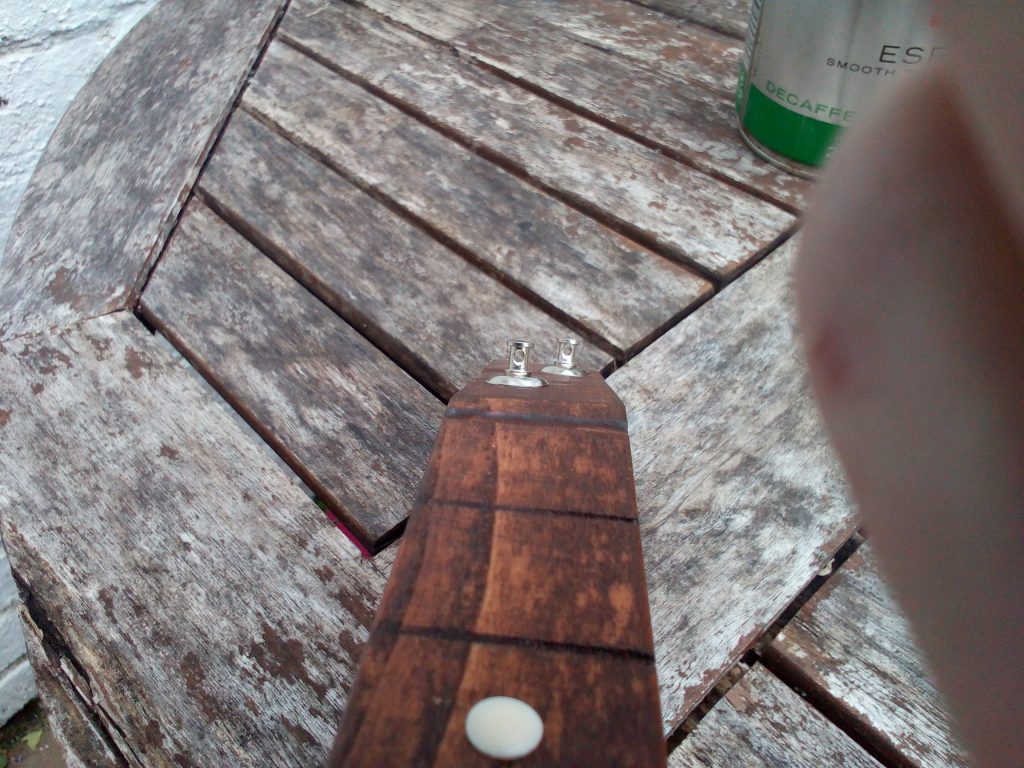
Next fit the tuners. Slide the surface washer over the end of the capstan so that the rounded profile of the washer is close to the string hole of the capstan – then push the end of the capstan into the hole from the face of the headstock as far down as it will go. Alternatively, position the surface washer over the hole and push the capstan through until the flange beneath the string hole meets the washer. Repeat for the other.
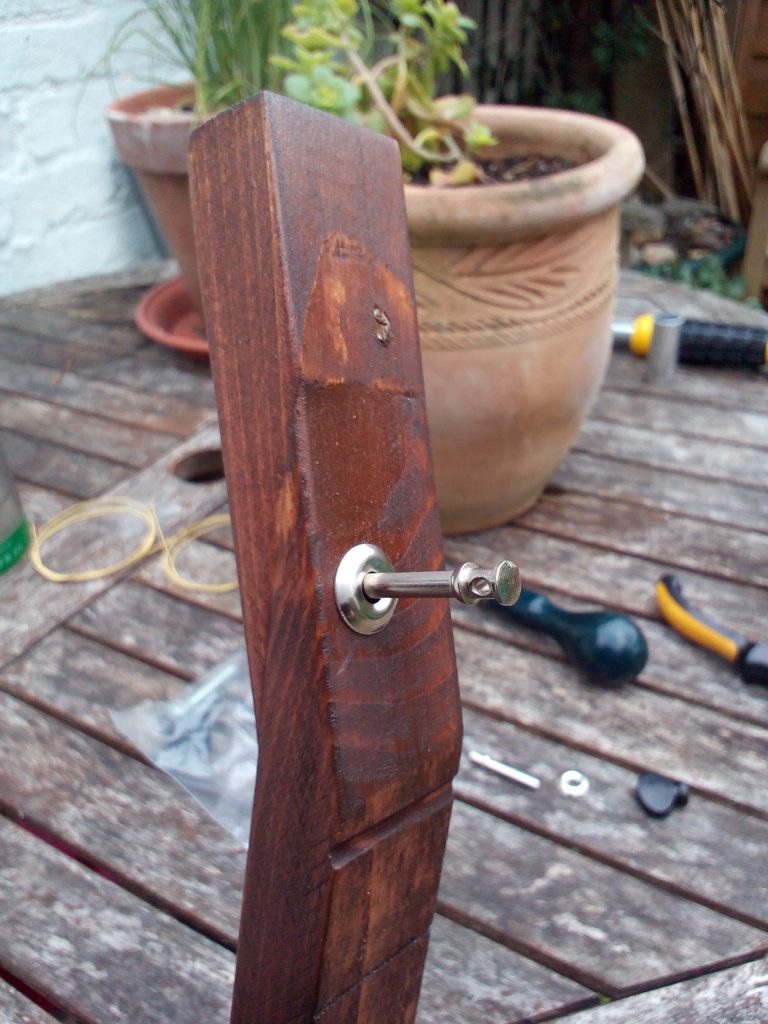
Flip the neck around and lightly position a tuning fob over the protruding stem of the capstan. Note how the lower stem of the capstan is not perfectly round but has two parallel edges. Take care to marry this with the hole in the base of the tuning fob before proceeding with the next step.

Now take a black tightening screw and push it into the (round) hole at the top of the tuning fob until you are confident the screw has started to engage with the entry point in the capstan stem. Begin to tighten with the Philips head screwdriver. The key here is to keep pressure on the other side of the capstan to counter the force of the screwing, so the flange of the string hole section remains seated against the surface washer. As you keep on tightening you will notice that the circular base of the tuning fob starts to get “sucked” into the recess cavity until eventually you feel resistance and you can stop screwing. It is this circular recess that provides the secret to our instrument’s stable tuning in providing added friction for the tuning peg. Repeat for the other peg.
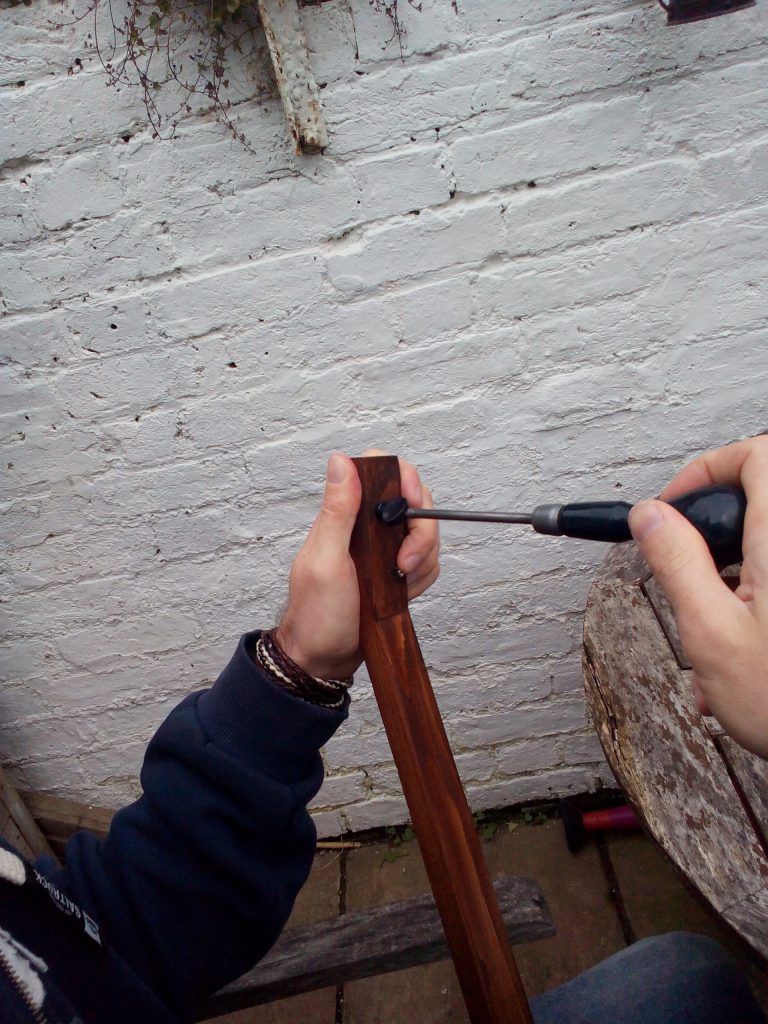
Do not be concerned if the tuning pegs appear a bit uneven, one fob base is further into the wood than the other, or they are at slightly different angles in terms of how they pass through the headstock. All that matters is that the pegs – when you test-turn them after screwing in – are tight and difficult, but not impossible, to turn. (If impossible then slacken off the screw ever so slightly and retry/repeat as required). A bit of squeaking is always a good sign (from the peg that is. If you are the one squeaking then you have definitely over-tightened them!)
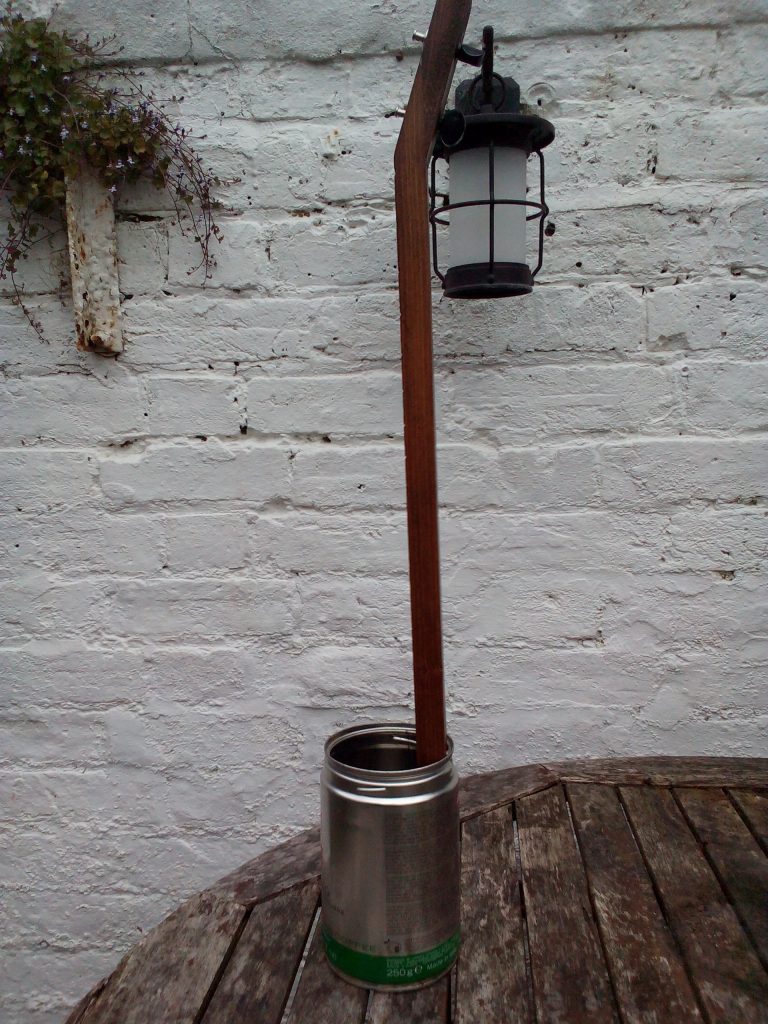
We are now ready to fit the neck to the can. This is probably the hardest part of the assembly and may prove a little tricky to describe in word and pictures alone – so please bear with us.
What we are looking for here ultimately, is for the base of the neck to be making contact with the inner base of the can – with the 2 holes in the base of the can approximately centred in line with neck as shown below, and for the corners of back of the base of the neck to be making contact up against the round inner wall where it meets the base of the can. In other words, as snug a fit with maximum contact and as close a marry up between neck and body as is possible as far as straight and circular edges working together are concerned!
Fortunately the pre-drilled hole around 5 inches up from the base at the back of the neck will help guide you. With the can resting on a work surface, with the hole at the back of the can under the rim facing towards you, slide the neck into the can perpendicularly from the top and locate the hole in the wood through the hole in the can.
Grip the neck and can together with your left-hand (assuming you are right-handed), with your thumb pressing against the back of the can to the section around the small logo, while your middle and ring fingers are over the rim inside the can pushing the neck tight up against the can – paying particular attention to the base of the wood in ensuring it is firmly resting against the bottom of the can and pushed back to make contact against the wall as described.
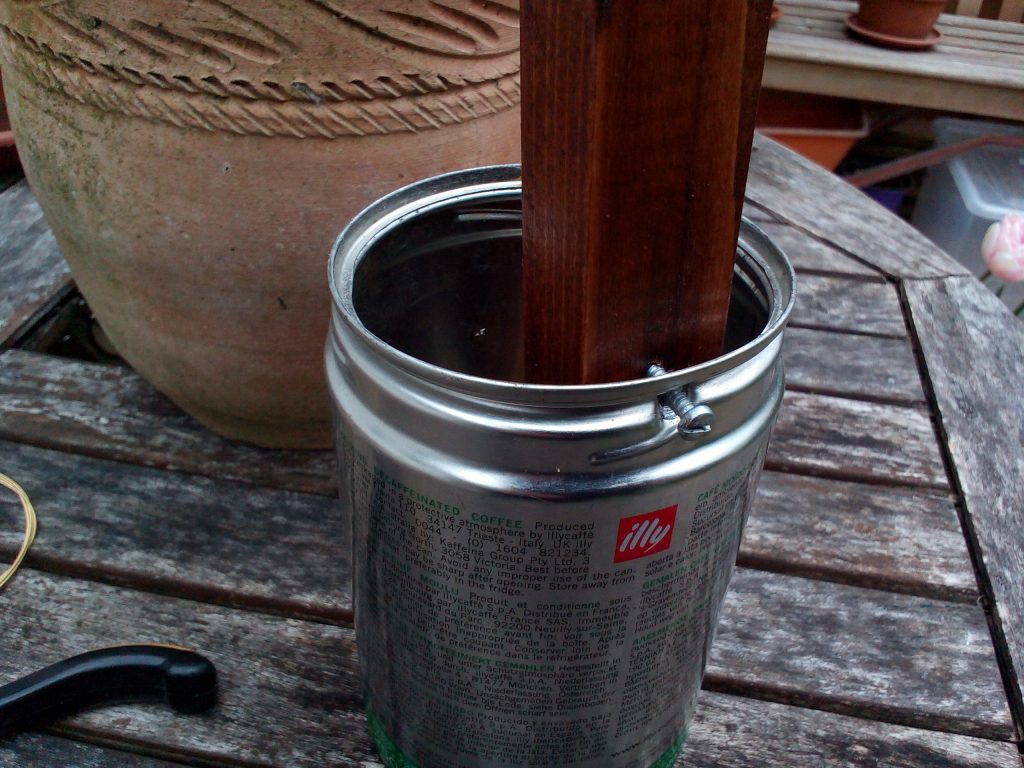
Take the salvage screw with your right-hand and pass it through the hole of the can so it starts to enter the hole in the wood. Then reach for the screwdriver and begin to tighten carefully. Keeping your left-hand tightly clamping the can and neck together (still resting on the work surface), curl your pointer finger around the neck and rest it on the rim of the can and against the right side of the neck (as you look at it from the back). This way you can use this finger to counter the inclination of the neck to begin to rotate clockwise as you tighten the screw and keep the neck both perpendicular and sitting flush against the base of the can.
It is important not to use an electric screwdriver for this stage as that is more likely to lead to over-tightening and deforming the cylindrical and circular nature of the can which will probably weaken the joint and fit. Stop the screwing once if feels as though the screw is in the wood far enough and the head of the screw is secure against the metal of the can, and that it feels as though any further screwing would risk the perpendicular position of the neck inside the can being compromised in spite of your pointer finger providing counter-pressure to keep it upright. Once you have stopped, you should be able to lift the neck and gently sway it in the air and the assembly will feel satisfyingly solid, with the can firmly joined to the neck and not wobbling. If you examine the assembly side on you should note that the neck leans forward, due to the inner rim of the can and the neck being tight up against wall of the can at its base.
Now we are onto the final phase of stringing and tuning your instrument up ready for playing. Firstly a word on the type of tuners we are using here. These “friction” tuners – as found on traditionally designed ukuleles and other stringed instruments – rely on being held tightly in place to keep in tune, and with no gears involved. This latter point is worth expanding on. Because gears are designed to effectively “slow down” rotation, the absence of gearing means that one full rotation of a friction tuning peg is the equivalent of around 15-20 entire 360° rotations of a typical geared tuner. In other words, a small movement makes a big difference.
So while sometimes this can lead to frustration for people used to the forgiving nature of geared tuners, one advantage is that it is very quick to tune new strings up to pitch with these gearless tuners. And due to the design of our instrument, once the note is reached and the string has had time to stretch out and bed in over a few days, the pitch generally remains very stable.
Prepare the position of the tuners for the process that follows. Turn the fobs of both pegs so that the string-holes in each capstan are running in line with the neck. You can move the pegs in either direction in lining up the holes with the neck length. This will give you more practise at turning the purposefully “stiff” tuners and allow them (and you) to “warm up” as it were.
Unfurl the strings included with your kit. As there is only around a tenth of a millimetre difference in core diameter between the D and G strings it can be very difficult to tell which-is-which from sight alone, so we have added a small label to help you identify.
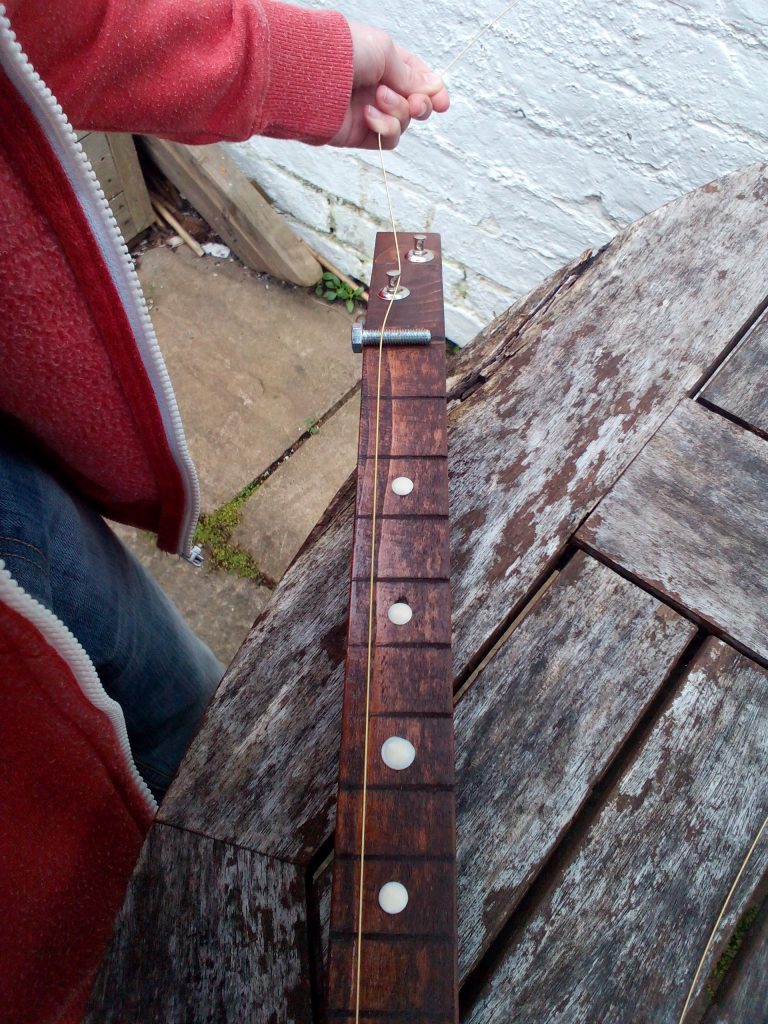
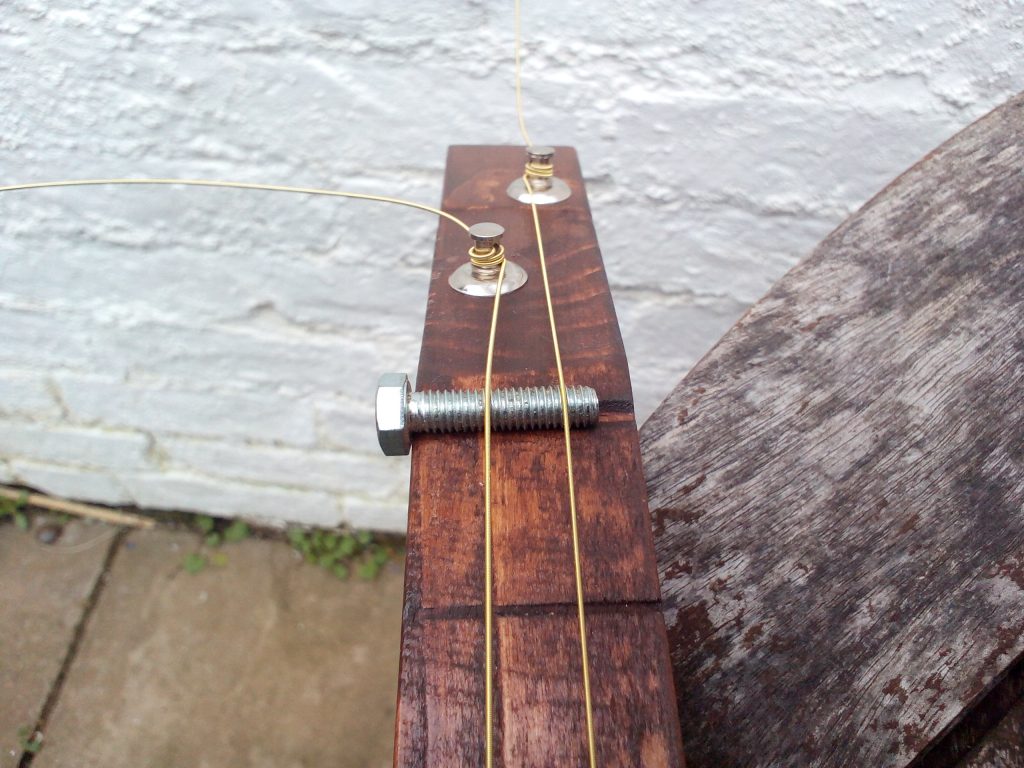
Remove the label on the one marked “D” and pass it through the left-hand hole as you look at the can from the bottom with the neck facing up (fret markers to the sky). Pull the string through as far as it will go until the section around the “ball” (small metal ring) blocks further movement. (The picture below shows both strings inserted into the base of the can for illustrative purposes. This is the resonating surface of the instrument. When you are done, just listen to the strings ringing out with this part of the can held up closely to your ear. It is a great tone!)
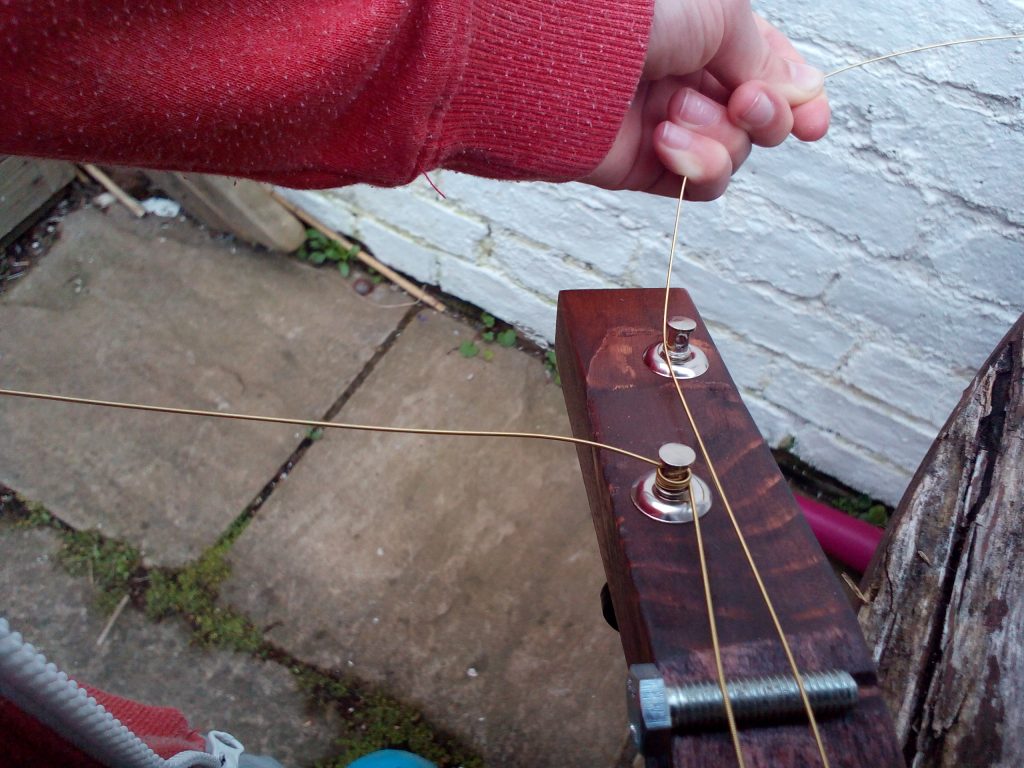
Pass the string along the outside (not through) the right-hand side of the left-hand tuner and pull tightly, keeping the string held against the side of the capstan – below the hole, as far down the shaft as you can. (We are describing a method whereby we do not yet place the bolt in position, although the picture below shows the alternative approach of resting the bolt in place before beginning).
Now wrap the string to the left one full rotation around the capstan and back up to the starting position, keeping this pulling tension in place through the movement. Give another good pull on the string end that you should be very firmly gripping beyond the top of headstock in the direction of the neck. Wind again to the left, still tightly pulling on the string, but this time when you have rotated 180°, pull the string tightly towards you while pinching the string winds on the capstan with the other hand to prevent these un-spiralling during the next movement.
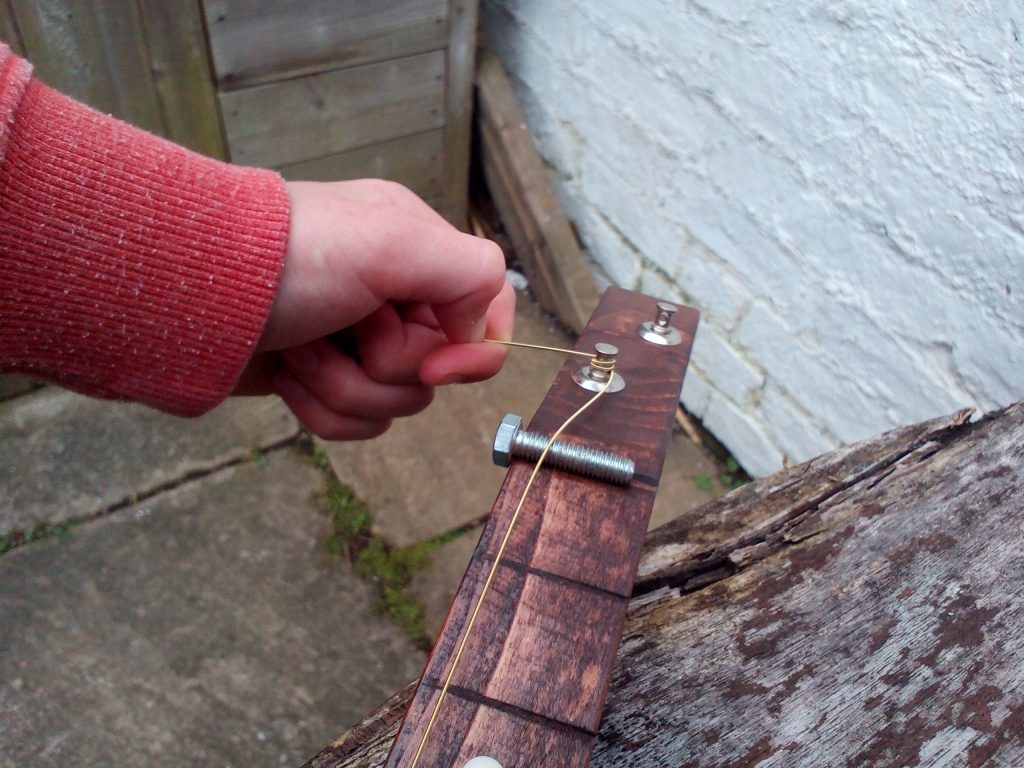
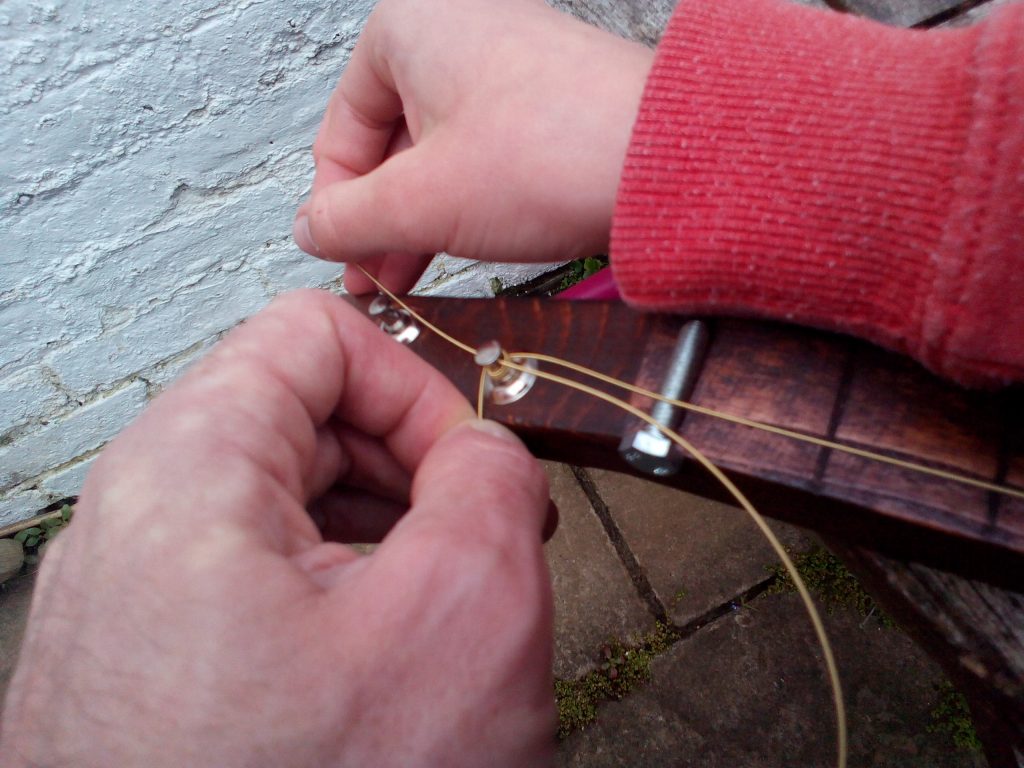
Then loop the string end up to pass into and out of the capstan string hole – with your string-winds beneath the hole – and sharply pull the end tightly “North” of the headstock end away from you (you can now release the pinch on the capstan with the other hand). The picture below shows this step being done without pinching the string-winds in place on the capstan and you can see how some slack has developed, that we want to avoid if we can for a perfect string fitting.
Keep the string-end section taut and tightly held (with your weaker hand) and give a couple of twists (not full turns) of the peg fob so that the capstan rotates anti-clockwise as you look at it from the face (clockwise turns if looking at the headstock from the rear). That will be enough to give the string some basic holding tension, meaning that you can finally release your tight-pull maintained throughout this phase, and instead reach for the 5mm bolt.
Slip this bolt under the string from the left just below the first fret, and move the string along a few grooves at a time until the underside of the bolt head is against the side of the neck and the string is roughly parallel with the side of the neck. Then slide the bolt up to and into the channelled groove just before the headstock angles down. If you test-pluck the string now it should sound pretty good already and give you a taste of what is to come!
With the “nut” (bolt!) held firmly in place by the D string, repeat the process for the G string. This time you can lay the string over the bolt, into the most suitable groove (for an approximately 1cm string spacing), pass the string against the outside of the left-hand side of the right-hand tuner, and your manual winds will be to the right for the 1½ ravels upwards around the capstan before slipping the end up through the string hole while keeping maximum hand-tight pulling tension on the string at all times. Similarly, the turning of the peg needs to be in the opposite direction to the first one also.
Once you have again started to “lock in” the string winds with a couple of quick twists (remember these pegs will really need adult-strength to turn), and are happy with the look of the string spacing, you can then proceed to further tune the strings up to final pitch (D and G in the 3rd octave range, respectively).
Tune the lower of the two strings firstly (D) and then move on to the G. Don’t spend ages fine-tuning the D before moving on to the G, because the pitch of the D will only change again when the tension of the G is added. Get the first string up to D then move on, until you get the second string up to G. You can then go back and re-tune remembering that it only takes very small movements to make fine adjustments.
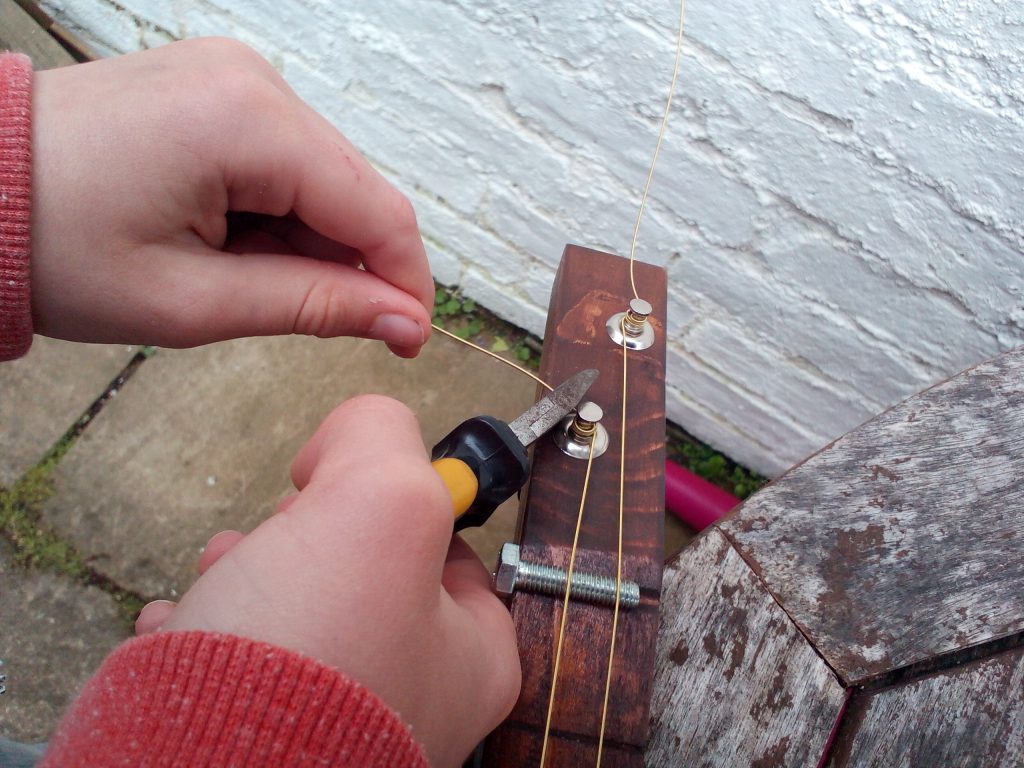
Cut the ends of the strings off with wire-cutters, close to the capstan but be very careful not to cut any other part. Once both excess ends are cut-off, check and retune again as the process of the snipping is likely to have jolted the strings a little.
When you are content with the pitch of the two strings, you may need to tighten the black screws again slightly to further lock the tuner in (especially as you may have had to slacken them off slightly during this process). Take care not to turn the screw so tightly that you then affect the tuning by turning the capstan with it. As such, keep a firm but steady grip of the peg fob while you tighten to help counter this effect.
Don’t worry about the pitch being a little sharp if you move beyond your target, as this will help with stretching the steel strings out for a more stable tuning and they will naturally “flatten”. As long as the strings sound pleasing to the ear that is all that matters. You can easily test by ear the relative tuning of the two strings (which are in “fourths”) by very lightly touching (not pressing) the D string directly above the 5th fret marker and plucking the string. A beautiful chime should ring out. While you can still hear the wonderful sound (called a “harmonic”) do the same for the G string except touch at the 7th fret. Both notes should sound the same.
Your instrument is complete and in tune so if you need any pointers on playing, head on over to our guide to slide page.
Well done and have fun!